Sutter MPC200
Hardware Config
Connect the USB to the computer.
Use an AC power cable to connect the controller to a power outlet.
Flip the power switch on the front of the 1U rack controller.
Software Config
In ScanImage, open the Resource Configuration window from the startup dialog or from the Main Controls window under File>Configuration.
From the Resource Configuration window, click the “+” button. Select Motor Controller from the sidebar, and select Sutter MPC200. Give it a name and continue.
A window like shown below will be displayed. Below the image is a description of each of the configuration parameters
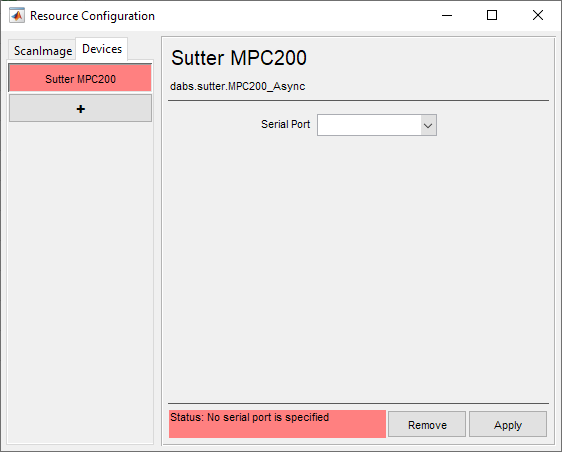
Serial Port |
Select the COM port assigned to the computer Note The COM port can be determined by powering off and disconnecting the USB cable for the controller, and then watch the windows device manager under Ports (COM & LPT) while reconnecting and powering on the controller to see which COM Port is established. |
Once the device has been configured, it can be added to the ScanImage® imaging system via the left pane of the Resource Configuration window under the ScanImage tab after clicking the SI Motors button. This will reveal a page (see below) that will allow each of the axes to be configured as a MPC200 axis.
Scaling factors are provided in addition to the configuration settings.