Acquisitions

There are three types of acquisition: Focus, Grab, and Loop. These each have their own button dedicated to them on the bottom of the Acquisition Controls GUI.
See a description of each in the table below:
Continuous acquisition without file-saving, until ABORT is pressed. Used for searching specimen, panning & focusing, etc. During FOCUS, the following are disabled: file saving, external triggering, and volume imaging. |
|
Start (or arm) a single acquisition. |
|
Start (or arm) a sequence of acquisitions (for up to the specified number of |
When starting an acquisition, check that the PMT is on. For PMTs configured within ScanImage,
check the PMT widget for the PMT state. These PMTs can be made to turn on at the start of acquisitions and off at their conclusion via the Auto On checkbox.
Focus
A Focus acquisition continuously acquires without saving to a file (even if the Save box is checked), until ABORT is pressed.
This displays a live stream of collected images to the viewport. The channels from which imagery is received but not necessarily displayed
is selected from the Channel Table of the Channels tab. The channels shown and their portrayal is configured from the Histograms of the Display Settings panel.

Once a region of interest is found, a Focus acquisition can be made with the imaging scanner of choice to ensure good image quality before acquiring with Grab or Loop.
If a beam modulator was configured, the excitation intensity can be adjusted via the beams slider. While imaging, the slider can be used to adjust the laser intensity.
Now is also a good time to adjust PMT gain if necessary. For ScanImage configured PMT devices, this can be done by clicking the text within the widget and entering values in the dialogue window.

Regardless of the scanner configured from the Scanner Configuration Panel,
the scan phase will typically
need to be adjusted to align pixels in a spatially accurate manner.
This can be done by clicking the Auto Adjust Line Phase button on the
XY Panel.

Note
During FOCUS, the following are disabled: file saving, external triggering, volume imaging.
Loggable Acquisitions
Acquisitions are organized into several units:
Frame
Slice
Volume
Acquisition (acq)
The concept is important both here when configuring the acquisition, and also when analyzing the acquired data afterwards.

A slice can have many frames; a volume can have many slices; and an acq can have many volumes.
Volume and slice are only relevant in the context of stack acquisitions, and
Acquisitions are only relevant in the context of looped acquisitions.
For example, the acquisition can be configured for a loop of planar acquisitions leaving stacks disabled and configuring just the number of frames per acquisition as well as the number of acquisitions. The number of slices and number of volumes will be disregarded.
Grab
Once a range of interest is found and imaging settings have been configured, a Grab can save images to disk.

Logging Parameters
The following settings affect how data is saved for a grab or loop acquisition.
First, check the Save option in the bottom right panel of the Acquisition Controls GUI.
This will allow you to configure the save options.
|
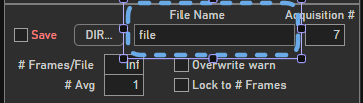
Sets stem of filename to be saved for next or ongoing GRAB/LOOP acquisition. The Acquisition # is appended to specified Basename to create the full filename, e.g. file_001.tif in example shown. |
|
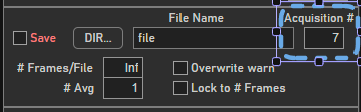
Sets number to append to specified Basename to create the full filename. Value is automatically incremented at end of each GRAB or LOOP mode |
|
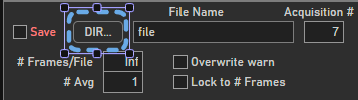
Launch dialog to select save directory to which files are saved. |
|
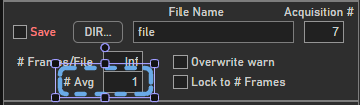
Specifies # of frames to average together before appending single (averaged) frame to current log file. Value > 1 implies file averaging is enabled. Note File averaging capability is separate from the display Frame Averaging specified in Channels GUI Note File averaging implies data reduction: raw data is lost and file size is reduced |
|
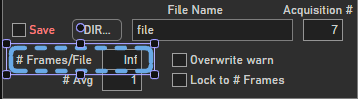
Specifies the number of frames to be saved per slice of an acquisition. Appends full filename to indicate the number of files associated with a set of frames, e.g. file_001_001.tif, file_001_002.tif if the frames from a single acquisition are saved to two separate files. |
|
Sets and maintains the number of frames per file to the number of frames per acquisition. |
|
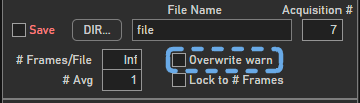
Toggles on/off overwrite warning message. By default the acquisition counter will update based on the highest number detected on the end of file already located in the logging directory. There is nothing stopping users from changing this number to something lower which will overwrite data already present with the same base name and acquisition number. Enabling this warning will cause a dialog box to appear if you change the base name or acquisition # in such a way that you might overwrite data. |
|
Forces |

With these settings configured, a Grab acquisition can be done by clicking the Grab button.
Loop
To do a Loop acquisition, which is a series of Grab acquisitions,
one needs to configure a few more settings.

The text field to the right of
Acqis used to specify the total number of acquisitions.The text field to the right of
Loop Timer [s]is used to specify the interval, in seconds, between the starts of consecutive acquisitions in the loop.

After these fields are configured, a Loop can be initiated by clicking the Loop button.
Note
In this instance, the Loop uses a ScanImage® “generated” Acquisition start trigger. However, it is possible to use an external signal to trigger the start of each acquisition as well. See Acquisition Triggering