Picoquant Remote Interface
- Author:
Lawrence Niu <lawrence@mbfbioscience.com>
- Last Updated:
2022-09-08
Note
This interface is only available when in ScanImage® Premium.
Note
Support for FLIM using Picoquant hardware is currently limited to what is available using the SymPhoTime software. Direct hardware interface is currently unsupported.
Setup
Hardware Setup
Communication between Picoquant hardware and ScanImage® DAQ cards and scanners are outlined below:

Configuration set by ScanImage® is synchronized with the SymPhoTime software before acquisition begins. This is through an internet connection and all commands are sent remotely through this connection via the ScanImage® plugin.
ScanImage® controls all relevant DAQ hardware and scanners. With the sole exception of the line trigger, all other microscope-related controls are managed by ScanImage® and its configuration. The line trigger, meanwhile, should be physically connected to the correct Picoquant port so that it can be seen by SymPhoTime. For more information on how the line trigger should be configured in ScanImage®, take a look at the Configuring a Line Clock using Linear Scanner or Configurating a Line Clock with a Resonant Scanner.
While ScanImage® controls the microscope, SymPhoTime will collect and visualize the FLIM data acquired by the PicoQuant hardware. This data is not passed to ScanImage® and is solely controlled by SymPhoTime.
SymPhoTime
The ScanImage® Picoquant plugin is dependent on Picoquant’s SymPhoTime Software to communicate with Picoquant hardware. The following instructions detail how to ensure that ScanImage® can communicate with Picoquant’s SymPhoTime software.
Note
ScanImage® does not do any validation on the system setup so it is up to the user to ensure that the system outside of ScanImage® works properly.
Open SymPhoTime with a workspace.
Open the Remote Server Window

Remember the Remote Server IP Address. This will be used when configuring ScanImage®.

ScanImage®
Note
SymPhoTime must remain on in order to listen to network commands sent by ScanImage®.
Open the Machine Configuration Window by editing a current Machine Data File or creating a new one.
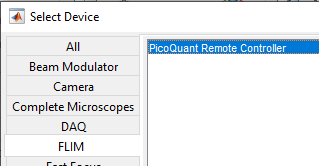
Add the “PicoQuant Remote Controller” Device.
Set the “Host Address” to the IP listed for SymPhoTime.
(Optional) Set the Start Delay to account for network latency.
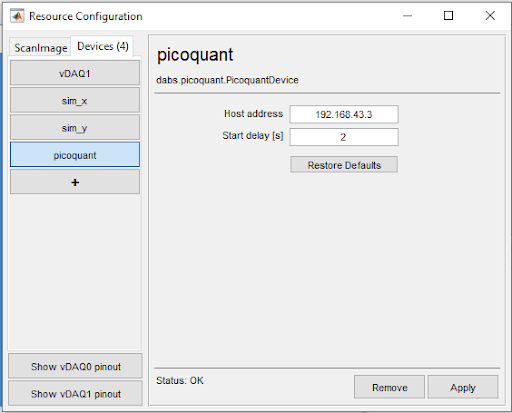
Click on “Apply” and continue with regular Machine Configuration.
Before starting the acquisition, make sure that the “Enable FLIM” checkbox in the widget sidebar is checked.

FAQ
Turn Off Simulated Mode
ScanImage® will use SymPhoTime’s simulated mode when logging is disabled. To disable simulated mode, logging must be enabled.
Configuring a Line Clock using Linear Scanner
By default, the Linear Scanner does not generate a Line Clock in ScanImage®. A workaround using a dummy beam modulator should be used to represent a line clock. The instructions below outline how to set this up.
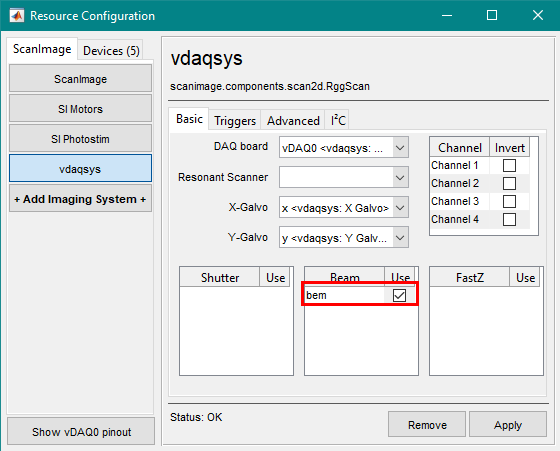
In the Machine Configuration Window, add a new Beam Device.
Configure the beam to have a maximum voltage of 5 Volts and a power limit of 100%
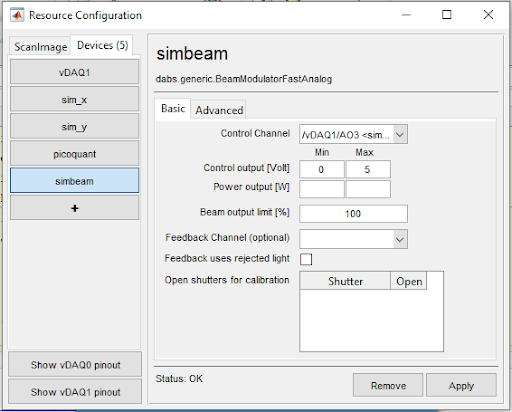
Bind your newly configured beam to the scanner you wish to use with Picoquant.
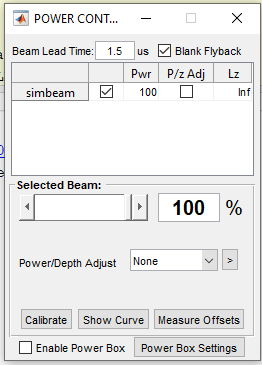
Before starting the acquisition in ScanImage®, set the beam’s power output to 100% in the Beam Control window.
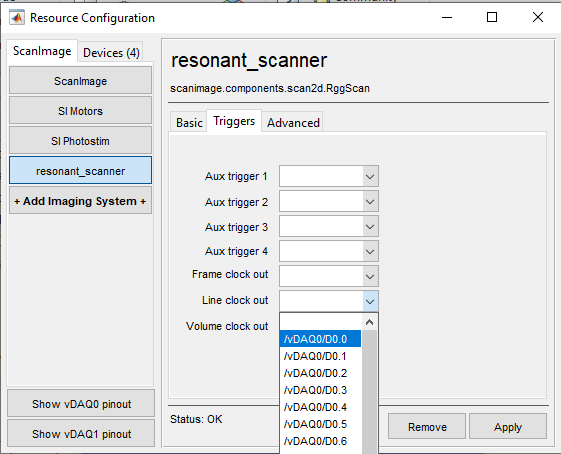
Configurating a Line Clock with a Resonant Scanner
In contrast to the Linear Scanner, the Resonant Scanner supports generating a line clock. Nevertheless, setting up the Line Clock output is displayed below.
