Tile Objects
The Tile feature makes use of a new class object called a Tile. Tile objects contain the following information:
Sample Point: The X,Y,Z coordinates of the Tile object. This coordinate references the center of the tile
and is in the Sample Relative coordinate space.
hTile.samplePoint =

    -13.2500    0.3125         0
Note
The Z postion can be quickly accessed through a zPos property of the tile object
Dimensions: Tile objects also contain the size of the Tile in X and Y (um), corner point coordinates (um), and an affine transformation matrix used to convert the Tile coordinates from their native Sample Relative (real space in um) coordinates, to Scanner Relative (scan angles in degrees optical) which is used by the scan system to properly scan the Tile.
hTile.tileSize =
    386.7233  383.2632

hTile.tileCornerPts =
    -206.6116 -191.3191
     180.1116 -191.3191
     180.1116  191.9441
    -206.6116  191.9441

hTile.affine =
    386.7233     0       -18
       0     383.2632    -18
       0         0         1
Note
The position and dimension data of the Tile objects will not accurately represent the Tile in real space until the user runs the Stage Alignment procedure. This procedure uses the Motion Correction feature and step sizes of known size (in microns) by the stage to create a relation between scan angles, pixels, and microns. See the Alignment page for additional details.
Image Data: Tiles contain an imageData property for storing images acquired at the Tile location. Tile image data contains enough entries for all channels available but only channels that are actively displaying in the Channel Window are actually filled with date. Tile image data can either be held in memory or it can be saved to disk and recalled only when needed. By default all Scan Tiles and Overview Tiles do NOT store image data in memory. In this case the image data is wrapped in an Image Pyramid class which saves the image data to a binary file on disk and will load and unload the actual data as needed, such as when the tile is on screen versus off screen as a result of view panning. The Image Pyramid can also load the image data at a downsampled resolution which is used to reduce memory use as the user zooms in and out of the view.
 hTile.hImgPyramid(chan) =

          ImagePyramid with properties:

          path: 'C:\Users\scanimage\AppData\Local\Temp\ScanImage_ImagePyramid'
     imageSize: [512 512]
    imageClass: 'int16'
 bytesPerPixel: 2
     imageInfo: [1×1 struct]
      filePath: 'C:\Users\scanimage\AppData\Local\Temp\ScanImage_ImagePyramid\D9A59B25B1A3D447.bin'
           fid: 5
          lods: [10×2 double]
lodFileOffsets: [0 524288 655360 688128 696320 698368 698880 699008 699040 699048 699050]
  lodFileBytes: [524288 131072 32768 8192 2048 512 128 32 8 2]
Lesser Functions: There are 3 lesser options wich are useful
Tile ID: A hash code which uniquely identifies the tile.
hTile.uuid =
    '503F2AD9910EE247'
Copy function: Creates a tile with the same geometry and the image data in most cases.
newTile = hTile.copy();Is Equal Function: Determines if 2 Tile Objects are effectively the same.
tf = hTileA.isequalish(hTileB);Set New Sample Point: Updates a Tiles Sample Point which will also update its Corner Points to reflect the change.
hTile.setNewSamplePoint([X Y Z]);Tile Construction: Tile objects are generally constructed through Tile Generator Tools but they can also be created through a provided list of parameters.
% tfInMemory == A boolean for whether image data should be stored in memory or saved to disc via the Image Pyramid.
% samplePoint == The XYZ position of the tile center in Sample Relative coordinates (um).
% cornerPoints == The XY coordinates of the Tile corner points in Sample Relative coordinates in the order of TL, TR, BR, BL where TL is (-,-) and BR is (+,+).
% affine == 3x3 Affine Matrix used to transform spatial data from Sample Relative space to Scanner Relative space.
% channels == Available imaging channels (i.e. [1 2] )
% imData == Imaging data, a cell array of channel image data with empties for inactive channels i.e. {[512x512] [512x512] [] [512x512]}
% resolutionXY == [1x2] Matrix specifying XY resolution of Pixels Per Line and Lines Per Frame for imaging.
% displayAvgFactor == Tile image data reflects rolling display averaging so this value indicates what the average factor is.

 tiles = scanimage.components.tiles.tile.generateTile(tfInMemory, samplePoint, cornerPoints, affine, channels, imData, resolutionXY, displayAvgFactor);
Tile Types
Tile objects are sorted into 3 sub-types based on their function. Tile sorting depends on which array the Tiles are managed in.
Live Tiles
In the Tile View there is a button to enable a Live Tile Mode. This creates a unique Tile object managed in the view which will update its image data on a per-frame basis as the user images. This functions the same way as the imaging channel windows except that it is wrapped in a tile object containing locational and dimensional data.
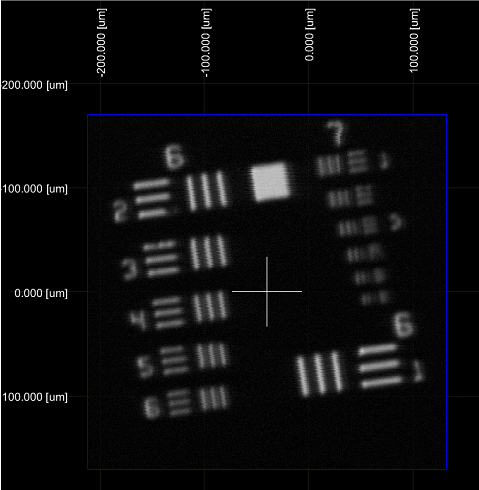
The Live Tile is marked with a dark blue outline and the image data displayed within is controlled by the Live Tile panel on the view. If a channel is selected that is not currently being imaged (not selected in the channels window) the image rendered in the tile will be empty. Otherwise it will display the same image in the respective channel window. Multiple channels can be displayed simultaneously with different colors and varying face alphas for transparency. See the Tile View page for additional details.
As the user traverses the sample with their stages the Live Tile position in the view will update accordingly as will the image data. This allows the user to traverse the sample with ease.
Scan Tiles
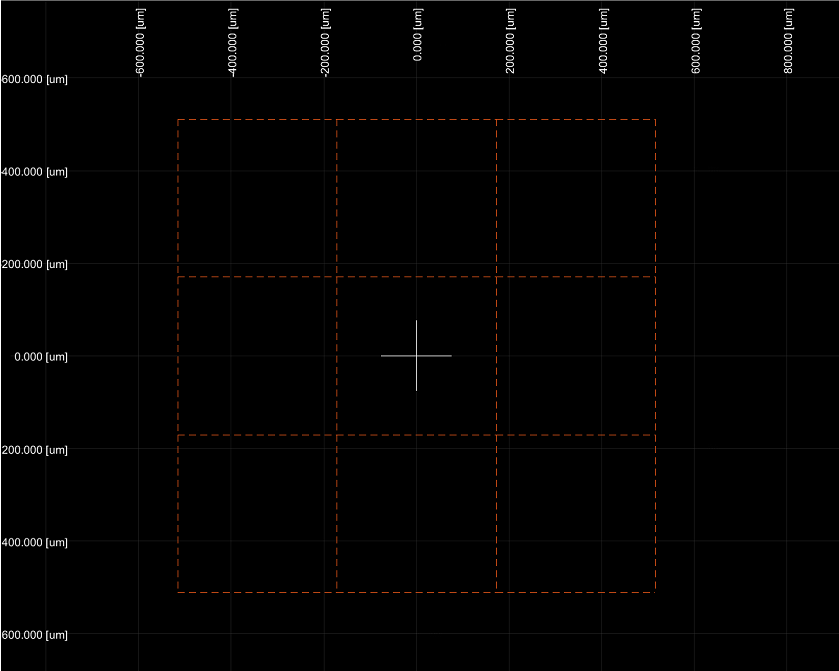
The user can also designate Scan Tiles in any addressable location and of various sizes and rectangular shapes. Scan Tiles are Tile objects with empty image data and a dashed orange outline. Scan Tiles designate areas to be scanned and are similar to the mROI feature except that the range of areas is expanded to areas addressable by the users XYZ stages. These are used for setting up mosaic or tiled scans where active Scan Tiles will be imaged automatically in quick succession.
Overview Tiles
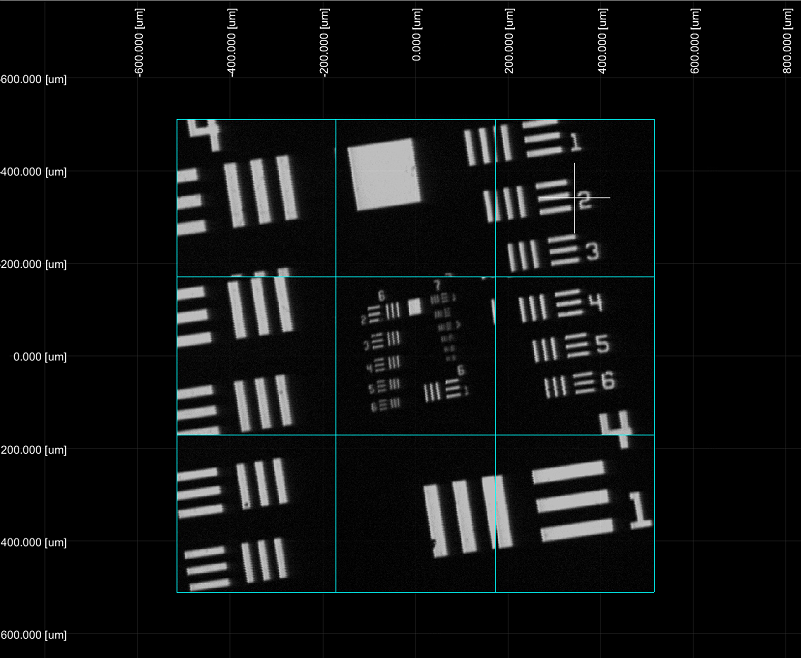
Collected images from a Live Tile, from one of the ScanImage channel windows, of from a scanned Scan Tile can be pinned to the ovierview by right clicking and selecting the “Add to Overview” option from the context menu. This will add a fixed Tile object at the location the image was collected to the overview. You can also mass add all filled Scan Tiles to quickly pin a moasic image. Tiles contain image data from all channels that were active during the acquistion of the Tile.